Difference between revisions of "Greenfoot"

From CompSciWiki
Jump to: navigation, search
(Added comic credit)
 
(39 intermediate revisions by 3 users not shown)
Line 2: Line 2:
 
|Chapter_TOC=[[Extra Labs]]
 
|Chapter_TOC=[[Extra Labs]]
 
|Previous=[[QR Codes]]
 
|Previous=[[QR Codes]]
|Introduction=This lab is an introduction to Greenfoot. Greenfoot is an interactive tool for building Java programs using a mixture of programming and interactivity. With Greenfoot, you are able to get a 2D graphic program up and running much faster than you would using regular Java.
+
|Introduction=For this lab you are going to create a game using Greenfoot. Greenfoot is an interactive tool for building Java programs using a mixture of programming and interactivity. With Greenfoot, you are able to get a 2D graphic program up and running much faster than you would using regular Java. By completing this lab we hope you become more familiar with concepts such as objects and classes.  Good luck!
  
To familiarize you with Greenfoot, we will show you how to build a simple Breakout game.
+
[[Image:Greenfoot.png|800px|Image by Graeme Peters]]
 
|Body=
 
|Body=
 
== Step 0: Starting a New Scenario ==
 
== Step 0: Starting a New Scenario ==
Line 23: Line 23:
  
 
Notice how nothing changed before you pressed the compile button?  The compile button is like a save button, none of the changes you make will take effect until you compile your program.
 
Notice how nothing changed before you pressed the compile button?  The compile button is like a save button, none of the changes you make will take effect until you compile your program.
== Step 2: Adding a Paddle ==
+
== Step 2: Creating The Paddle ==
 
===Setting Up the Paddle Class===
 
===Setting Up the Paddle Class===
First, right-click the following image and select Save As... and save it in the folder where you created your Greenfoot program.
+
#First, right-click this-> [[Image:PaddleV2.jpg]] image and select "Save As..." and save it in the folder where you created your Greenfoot program.
 
+
#On the right-hand side of your Greenfoot window, there are two boxes: One under "World classes" called "World" and another under "Actor classes" called "Actor". Right-Click "Actor" and select "New subclass..."
[[Image:Paddle.gif]]
+
#Name your subclass Paddle by entering it into the New class name textbox.  
 
+
#Now, for the image, click the "Import from file..." box in the bottom-left of this window. Find and select the PaddleV2.jpg file you just saved.
On the right-hand side of your Greenfoot window, there are two boxes: One under "World classes" called "World" and another under "Actor classes" called "Actor".
+
#Press OK on that window to close it and create the new subclass.
 
+
Right-Click "Actor" and select "New subclass..."
+
 
+
Name your subclass Paddle by entering it into the New class name textbox. Now, for the image, click the "Import from file..." box in the bottom-left of this window. Find and select the Paddle.gif you just saved.
+
 
+
Press OK on that window to close it and create the new subclass.
+
 
+
In your main window, you want to add this newly created Paddle to your world. Press the compile button again to allow the Paddle you created to be usable. Then, right-click the Paddle box that now shows underneath the Actor box and select "new Paddle()".
+
 
+
===Getting Your Paddle Onto the Game Screen===
+
There are two ways to add the Paddle object to the game screen:
+
 
+
The first way is to select the "Paddle" box, which is now located under the "Actor" box on the right-hand side, and select "new Paddle()". When you do this, you'll now see the image of the paddle following your mouse cursor. You can now place the paddle in the game screen by clicking anywhere within it.
+
 
+
There is a problem with this way, however. If you click the "Compile" button, your paddle disappears! This is because it recompiled all the code within the world and classes to rebuild your game screen! To make your paddle stay in the world, you have to add it directly to the code. This is the second way of adding the paddle to the game screen.
+
 
+
To add your paddle to the code of the MyWorld class you made earlier, right-click the MyWorld box and select "Open editor".
+
 
+
You are now in the thick of actual Java programming!
+
 
+
In the editor, you will see the following code:
+
 
+
{{CodeBlock
+
|Code=import greenfoot.*; // (World, Actor, GreenfootImage, Greenfoot and MouseInfo)
+
public class MyWorld extends World
+
{
+
    //Constructor
+
    public MyWorld()
+
    {
+
        // Create a new world with 600x400 cells with a cell size of 1x1 pixels.
+
        super(600, 400, 1);
+
    }
+
}
+
}}
+
 
+
The code in block:
+
 
+
{{CodeBlock
+
|Code=public MyWorld()
+
{
+
    // Create a new world with 600x400 cells with a cell size of 1x1 pixels.
+
    super(600, 400, 1);
+
}
+
}}
+
 
+
Is code that is used to build the game screen. Currently, it just has one line of code that creates a 600x400 pixel world. Now we want to add your paddle object to the world.
+
 
+
Under the super(...) line, type in:
+
 
+
{{CodeBlock
+
|Code=Paddle myPaddle = new Paddle();
+
addObject(myPaddle, 300, 380);
+
}}
+
 
+
This will add a paddle to the world, 300 pixels from the left side and 380 pixels from the top.
+
 
+
Because all this code is within
+
 
+
{{CodeBlock
+
|Code=public class MyWorld extends World
+
{
+
  ... all your code is in here!
+
}
+
}}
+
 
+
When you say addObject(...) in your code, it is performing this action on MyWorld using myPaddle, the number 300, and the number 380.
+
 
+
These actions are called '''methods''' or '''functions'''. The values that are being used -- myPaddle, 300, 380 -- are called '''parameters''', which are values sent to a method.
+
 
+
In Java, methods are always called on an value called an '''object'''. In the above example, addObject(...) is performed on the MyWorld object.
+
 
+
Do not worry if you do not understand what this means right now; it will come with more practice.
+
 
+
If you press Compile on the game screen window, you will now see the paddle on the screen and it will stay there!
+
 
+
One problem with our code is that, if the size of the world ever changes, the paddle might not show up properly. Let's fix this. Change the earlier addObject code to:
+
 
+
{{CodeBlock
+
|Code=Paddle myPaddle = new Paddle();
+
addObject(myPaddle, getWidth() / 2, getHeight() - 20);
+
}}
+
 
+
Now, your paddle will always be in the middle of the screen, 20 pixels from the bottom, even if you change the values in the super(...) call and Compile.
+
  
 
===Moving the Paddle===
 
===Moving the Paddle===
 +
Select the "Paddle" box, which is now located under the "Actor" box on the right-hand side, and select "new Paddle()". When you do this, you'll now see the image of the paddle following your mouse cursor. You can now place the paddle in the game screen by clicking anywhere within it. You can also do this by selecting the Paddle box, holding the shift key, and pressing anywhere in the game window,
  
Right now, if you click "Act" or "Run" on the game screen window and press the left and right arrow keys, nothing happens. This isn't very game-like. We want our paddle to move around!
+
Right now, if you click "Act" or "Run" on the game screen window after adding a paddle to it and press the left and right arrow keys, nothing happens. This isn't very game-like. We want our paddle to move around!
  
 
To do this, we need to add code to the Paddle class so it can control its own actions.
 
To do this, we need to add code to the Paddle class so it can control its own actions.
Line 140: Line 58:
 
}}
 
}}
  
The comments in this code tell it all -- if you want you paddle to do anything, you have to add your code within the act() method. Change it so it looks like:
+
The comments in this code tell it all -- if you want your paddle to do anything, you have to add your code within the act() method. Change it so it looks like:
  
 
{{CodeBlock
 
{{CodeBlock
Line 193: Line 111:
 
#Select "New subclass..." from the list of options.
 
#Select "New subclass..." from the list of options.
 
#Name this class "Ball"
 
#Name this class "Ball"
#Find and select the image "beeper.png" from the "other" catagory
+
#Find and select the image "ball.png" from the "objects" catagory
 
#Press "Ok" to create the class.
 
#Press "Ok" to create the class.
  
===Add a ball to your game===
+
===Add a Ball to Your Game===
 
Before you can add the ball to your game you must first write the constructor.  Add the following code above the act() method in the "Ball" file.
 
Before you can add the ball to your game you must first write the constructor.  Add the following code above the act() method in the "Ball" file.
 
{{CodeBlock
 
{{CodeBlock
|Code =private boolean left;
+
|Code =private boolean goLeft;
private boolean right;
+
private boolean goUp;
private boolean up;
+
private boolean down;
+
 
private boolean gameOver;
 
private boolean gameOver;
 +
   
 
public Ball()
 
public Ball()
 
{
 
{
    left = true;
+
    goLeft = true;  
    up = true;
+
    goUp = true;
    down = false;
+
    gameOver = false;
    right = false;
+
    gameOver = false;
+
 
}
 
}
 
}}
 
}}
The variables left, up, down, and right keep track of which direction the ball is in. A true value indicates that the ball is moving in that direction. After you compile your project you will be able to add a ball to your game.To do this, right click on the "Ball" button on the main screen and select "new Ball()" and drag the new ball onto your game screen.
+
The variables goLeft and goUp keep track of which direction the ball is in. A true value indicates that the ball is moving in that direction. This means that, when goUp is true, the ball is traveling upwards; when goUp is false, the ball is travelling downwards. After you compile your project you will be able to add a ball to your game by selecting "new Ball()" and placing the new ball onto your game screen like you did with the paddle earlier.
===Make the ball move===
+
===Make the Ball Move===
Now you can add the following code to the act() method within the "Ball" source file:
+
To move the ball we are going to use the method setLocation(aNumber,aNumber) just like we did with the paddle. This time, however, we do not worry whether your are pressing the "left" or "right" arrow. Instead, the ball is just going to move on its own. Also, like we did with the paddle, we will set the location of the object based on its current location stored in getX() and getY().  This way, you can get the x and y coordinates of the object then add or subtract from these values to give them a moving effect.
 +
 
 +
Add the following code to the act() method within the "Ball" source file:
 +
 
 
{{CodeBlock
 
{{CodeBlock
|Code =//if the ball is moving up and to the right
+
|Code =if(gameOver == false)
if(up == true && right == true){
+
{
    setLocation(getX() + 1, getY() - 1);
+
    int changeX = 0;
 +
    int changeY = 0;
 +
           
 +
    if(goUp == true)
 +
    {
 +
        changeY = changeY - 1;
 +
    }
 +
    else
 +
    {
 +
        changeY = changeY + 1;
 +
    }
 +
           
 +
    if(goLeft == true)
 +
    {
 +
        changeX = changeX - 1;
 +
    }
 +
    else
 +
    {
 +
        changeX = changeX + 1;
 +
    }
 +
           
 +
    setLocation(getX() + changeX, getY() + changeY);
 
}
 
}
//if the ball is moving up and the left
+
}}
else if(up == true && left == true){
+
 
    setLocation(getX() - 1, getY() - 1);
+
The above code checks which direction the ball is currently moving in and keeps the ball moving in that direction.  This will make the ball move but as soon as it hits a wall it will stop. This is because, if it continues to add or subtract from its position, then it will be outside the bounds of the screen. To fix this and make the ball bounce off the walls, you will have to add methods to check if the ball is at a wall and, if it is, change the direction of the ball.
 +
 
 +
===Check if the Ball Hits a Wall===
 +
We need to check if the ball is at a wall so we can switch it's direction.  We use getX() and getY() to determine the ball's location.  If getX() is less then 10, the ball is at the left side of the screen and if it is greater than the width of the screen minus 10 pixels of padding, it is at the right side of the screen.
 +
 
 +
Add the following code after the act() method in the "Ball" source file:
 +
 
 +
{{CodeBlock
 +
||Code =public void checkSides()
 +
{
 +
    if(getX() <= 10)
 +
    {
 +
        goLeft = false;
 +
    }
 +
    else if(getX() >= getWorld().getWidth() - 10) // if
 +
    {
 +
        goLeft = true;
 +
    }
 
}
 
}
//if the ball is moving down and to the right
+
}}
else if(down == true && right == true){
+
 
    setLocation(getX() + 1, getY() + 1);
+
Like act(), checkSides() is also a method. There is difference between checkSides() and act(), however: because we manually made this method, Greenfoot will not use it until we tell it to like it does with the act() method, which Greenfoot uses implicitly. Since we know act() already runs code, we want to make sure that our checkSides code is also run. To do this, we must '''call''' it. Do this by putting checkSides() at the bottom of the act() function like:
 +
 
 +
{{CodeBlock
 +
||Code =public void act()
 +
{
 +
    if(gameOver == false)
 +
    {
 +
        int changeX = 0;
 +
        int changeY = 0;
 +
           
 +
        if(goUp == true)
 +
        {
 +
            changeY = changeY - 1;
 +
        }
 +
        else
 +
        {
 +
            changeY = changeY + 1;
 +
        }
 +
 
 +
        if(goLeft == true)
 +
        {
 +
            changeX = changeX - 1;
 +
        }
 +
        else
 +
        {
 +
            changeX = changeX + 1;
 +
        }
 +
           
 +
        setLocation(getX() + changeX, getY() + changeY);
 +
       
 +
        checkSides();
 +
    }
 
}
 
}
//if the ball is moving down and to left
 
else if(down == true && left == true){
 
    setLocation(getX() - 1, getY() + 1);


}}
 
}}
The above code checks which direction the ball is currently moving in and keeps the ball moving in that direction. This will make the ball move but as soon as it hits a wall it will stop. You will have to add methods to check if the ball is at a wall and if it is, change the direction of the ball.
+
 
== Step 4: Breakout Needs Bricks ==
+
Notice that the call to checkSides() is still in between the braces started up at the top of the act() method with the check
To add bricks to the game we first need to create a brick class.  To do this, follow these steps:
+
 
#Right click on the "Actor" button on the right side.
+
{{CodeBlock
#Select "New subclass.." from the list.
+
||Code=if(gameOver == false)
 +
}}
 +
 
 +
That's because we don't want to worry about whether or not the ball hits the sides when the game is already over.
 +
 
 +
This covers the side walls of the game. We also have to worry about what happens when the ball hits the top and bottom of the screen. Use this method:
 +
 
 +
{{CodeBlock
 +
||Code=public void checkTopAndBottom()
 +
{
 +
    if(getY() < 5)
 +
    {
 +
        goUp = false;
 +
    }
 +
    else if (getY() > getWorld().getHeight() - 5)
 +
    {
 +
        gameOver = true;
 +
    }
 +
}
 +
}}
 +
 
 +
The top of the screen has a coordinate of 0 so if getY() is less than 5 we know the ball is at the top of the screen. When this happens, the Ball's goUp variable is set to false because it should now move downwards. The "else if" does something different; it says that, if the ball hits the bottom, then the game is over.
 +
 
 +
Remember: This method still needs to be called while the game is running, so make sure to put:
 +
 
 +
{{CodeBlock
 +
||Code=checkTopAndBottom();
 +
}}
 +
 
 +
right underneath the call that you have in the act() method to checkSides().
 +
 
 +
The only thing left to check is whether or not the ball hits the paddle.
 +
 
 +
Add this method to the Ball class:
 +
 
 +
{{CodeBlock
 +
||Code=public void checkObjectCollision()
 +
{
 +
    Actor paddle = getOneIntersectingObject(Paddle.class);
 +
    if(paddle != null)
 +
    {
 +
      goUp = !goUp;
 +
    }
 +
}
 +
}}
 +
 
 +
And also put the call to this method underneath the checkSides() and checkTopAndBottom() that we have already added. This snippet of code is telling us that if our ball ever happens to hit a paddle, then go in the opposite direction we are already going.
 +
 
 +
To test all of this, make sure to save your files, press the compile button, and add a ball and a paddle to the game screen. When you press "Run", you should see the ball bounce off the walls and your paddle, and stop when it hits the bottom of the screen.
 +
 
 +
== Step 4: Creating The Bricks==
 +
To the complete the game we need bricks.  This process is similar to when you were creating the paddle class.  Follow these steps:
 +
#Right click on the "Actor" tab on the right hand side of the main project screen.
 +
#Select "New subclass..." from the list of options.
 
#Name this class Bricks.
 
#Name this class Bricks.
#Select the image "brick.png" from the "objects" catagory.
+
#Select the "brick.png" image from the objects category.
#Click "Ok" to finish creating this class.
+
#Press "Ok" when finished and compile your project.
#Compile your program.
+
You will not need to add any code to this class because all we do not need this object to move.  All we need is the brick image.
You will not have to add any code for this object because it does not have to move.  All we need to be able to do is make the brick appear and disappear.
+
=== Making Bricks Break===
 +
The main point of Breakout is for bricks to break when they are hit by a ball. To do this, we're going to add the following code in the Ball class's checkObjectCollision() method:
  
Now if you want to add a brick to your game, you need to open the "MyWorld" source code file.  Double click the "MyWorld" button on the right hand side to open the file.  From here you can add a brick to your game by adding the following code into the "public MyWorld()" method:
 
 
{{CodeBlock
 
{{CodeBlock
|Code=Bricks aBrick = new Bricks();
+
||Code=Actor brick = getOneIntersectingObject(Brick.class);
addObject(aBrick,100,100);
+
if(brick != null)
 +
{
 +
    goUp = !goUp;
 +
    getWorld().removeObject(brick);
 +
}
 
}}
 
}}
The above code creates a single brick and adds it to the position (100,100)Since a single brick makes for a pretty boring game we need to add a lot more. To do this, add the following code into "MyWorld":
+
 
 +
It looks similar to when a ball hits a paddle, in that its direction will reverse. However, there is an extra line of code here as well. It's telling the world to remove the brick that the ball has just hit.
 +
 
 +
Save, compile, add objects, and run your program to test it out!
 +
== Step 5: Adding All The Objects To Your Game ==
 +
Now that you have made all the different objects for your game it is time to test them all out.  To make the game work we need a ball, a paddle, and at least a couple bricksThe process of adding an object to the game is the same for all objects.  As an example, follow these steps to add a paddle to your game:
 +
#Right click "Paddle" tab on the right hand side.
 +
#Select "new Paddle()" from the list of options.
 +
#Now use the mouse to drag the paddle onto your game screen and click again to place it.
 +
#Repeat these steps to add a ball and the bricks.
 +
 
 +
If you want to add a bunch of bricks to your game without having to add them individually, add the following code into the public MyWorld() method within the MyWorld source file:
 
{{CodeBlock
 
{{CodeBlock
 
|Code =int x,y;
 
|Code =int x,y;
x = 20;
+
x = y = 20;
y = 20;
+
for(int i = 0; i < 195; i++){
       
+
//Create the bricks
+
for(int i = 0; i < 195; i++)
+
{
+
    // create a brick
+
 
     Bricks temp = new Bricks();
 
     Bricks temp = new Bricks();
    // add brick to the world
 
 
     addObject(temp,x,y);
 
     addObject(temp,x,y);
    // update coordinates
 
 
     x+=40;
 
     x+=40;
     if(x >= 600)
+
     if(x >= 600){
    {
+
 
           x=20;
 
           x=20;
 
           y+=20;
 
           y+=20;
Line 272: Line 315:
 
}
 
}
 
}}
 
}}
The above code is creating 195 bricks and adding them to the world.  Notice the variables x and y in the addObject() method. These variables are keeping track of where we want to place the bricks.  Each time a brick is added we need to update the position of where the next one is placed.  So after each brick is added "x+=40" says the next brick will be placed 40 pixels to the right.  Since the width of our world is 600 pixels, we need to start a new row once x >= 600.  To do this we update y by 20 pixels, starting the next row of bricks 20 pixels down.  It is important to note that the top left of the game world has the coordinates (0,0) and there are no negative coordinates.
+
This will add 195 blocks and arrange them in the appropriate order.
 
+
==Full Example==
===Full Example===
+
If you were unable to get your game working the full example is available for download [http://www.greenfoot.org/scenarios/4730 here].
The full example is available for download [http://www.greenfoot.org/scenarios/4723 here].
+
 
}}
 
}}

Latest revision as of 17:33, 5 April 2012

COMP 1010 Home > Back to Extra Labs

Introduction

For this lab you are going to create a game using Greenfoot. Greenfoot is an interactive tool for building Java programs using a mixture of programming and interactivity. With Greenfoot, you are able to get a 2D graphic program up and running much faster than you would using regular Java. By completing this lab we hope you become more familiar with concepts such as objects and classes. Good luck!

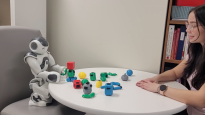
Image by Graeme Peters

Step 0: Starting a New Scenario

Once you have Greenfoot open, the first thing you have to do is open a new scenario. To do this, follow these steps:

  1. Click on the "Scenario" menu tab at the top left of the window.
  2. Select "New..." from the list of options.
  3. Choose "Breakout" for your project name.
  4. Save project to either your own folder or the desktop so it is easy to find.
  5. Click "Create" to finish making your project.

Step 1: Making a New World

Now that you have a blank scenario open the next thing you have to do is add a new world for your game to exist in.

  1. Right click on the "World" button on the right side of the window.
  2. Select "New subclass..." from the list.
  3. Name this class "MyWorld"
  4. Select the image "bathroom-tile.jpg" from the "background" catagory. This will be the main background of your game.
  5. Click "Ok" to finish creating this class.
  6. Press the "Compile" button on the bottom right hand side.

Notice how nothing changed before you pressed the compile button? The compile button is like a save button, none of the changes you make will take effect until you compile your program.

Step 2: Creating The Paddle

Setting Up the Paddle Class

  1. First, right-click this-> PaddleV2.jpg image and select "Save As..." and save it in the folder where you created your Greenfoot program.
  2. On the right-hand side of your Greenfoot window, there are two boxes: One under "World classes" called "World" and another under "Actor classes" called "Actor". Right-Click "Actor" and select "New subclass..."
  3. Name your subclass Paddle by entering it into the New class name textbox.
  4. Now, for the image, click the "Import from file..." box in the bottom-left of this window. Find and select the PaddleV2.jpg file you just saved.
  5. Press OK on that window to close it and create the new subclass.

Moving the Paddle

Select the "Paddle" box, which is now located under the "Actor" box on the right-hand side, and select "new Paddle()". When you do this, you'll now see the image of the paddle following your mouse cursor. You can now place the paddle in the game screen by clicking anywhere within it. You can also do this by selecting the Paddle box, holding the shift key, and pressing anywhere in the game window,

Right now, if you click "Act" or "Run" on the game screen window after adding a paddle to it and press the left and right arrow keys, nothing happens. This isn't very game-like. We want our paddle to move around!

To do this, we need to add code to the Paddle class so it can control its own actions.

Right-click the "Paddle" box in the Actor classes box of the main window and select "Open editor", just like you did to change the code in MyWorld.

This opens up an editor with the following:

 ...

public class Paddle extends Actor
{
    /**
    * Act - do whatever the Paddle wants to do. This method is called whenever
    * the 'Act' or 'Run' button gets pressed in the environment.
    */
    public void act()
    {
        // Add your action code here
    }
} 

The comments in this code tell it all -- if you want your paddle to do anything, you have to add your code within the act() method. Change it so it looks like:

 public void act()
{
    if (Greenfoot.isKeyDown("left"))
    {
        setLocation(getX() - 3, getY());
    }
    else if (Greenfoot.isKeyDown("right"))
    {
        setLocation(getX() + 3, getY());
    }
} 

Let's break this code down:

 if (Greenfoot.isKeyDown("left"))
{
    ...
} 

This says that, when the user is pressing the "left" key, which is the left arrow on your keyboard, then do the code that is in it's block. The block:

 else if (Greenfoot.isKeyDown("right"))
{
    ...
} 

Does the exact same thing, except when the "right" key is pressed.

These two blocks contain:

 setLocation(getX() - 3, getY());
...
setLocation(getX() + 3, getY()); 

These both change the location of the Paddle object, except one has "getX() - 3" while the other has "getX() + 3". This means that one moves the Paddle to the left of it's current X position by 3 and the other to the right by 3. Try changing these values and even flipping them around to see how it changes your Paddle!

To test the changes, compile the code, press "Run" on the main window, and press your right and left keys. The paddle now moves!

Step 3: Creating a Bouncing Ball

To add a ball to your game you will need to create a new actor. Follow these steps:

  1. Right click on the "Actor" button
  2. Select "New subclass..." from the list of options.
  3. Name this class "Ball"
  4. Find and select the image "ball.png" from the "objects" catagory
  5. Press "Ok" to create the class.

Add a Ball to Your Game

Before you can add the ball to your game you must first write the constructor. Add the following code above the act() method in the "Ball" file.

 private boolean goLeft;
private boolean goUp;
private boolean gameOver;
    
public Ball()
{
    goLeft = true;   
    goUp = true;
    gameOver = false;
} 

The variables goLeft and goUp keep track of which direction the ball is in. A true value indicates that the ball is moving in that direction. This means that, when goUp is true, the ball is traveling upwards; when goUp is false, the ball is travelling downwards. After you compile your project you will be able to add a ball to your game by selecting "new Ball()" and placing the new ball onto your game screen like you did with the paddle earlier.

Make the Ball Move

To move the ball we are going to use the method setLocation(aNumber,aNumber) just like we did with the paddle. This time, however, we do not worry whether your are pressing the "left" or "right" arrow. Instead, the ball is just going to move on its own. Also, like we did with the paddle, we will set the location of the object based on its current location stored in getX() and getY(). This way, you can get the x and y coordinates of the object then add or subtract from these values to give them a moving effect.

Add the following code to the act() method within the "Ball" source file:

 if(gameOver == false)
{
    int changeX = 0;
    int changeY = 0;
            
    if(goUp == true)
    {
        changeY = changeY - 1;
    }
    else
    {
        changeY = changeY + 1;
    }
            
    if(goLeft == true)
    {
        changeX = changeX - 1;
    }
    else
    {
        changeX = changeX + 1;
    }
            
    setLocation(getX() + changeX, getY() + changeY);
} 

The above code checks which direction the ball is currently moving in and keeps the ball moving in that direction. This will make the ball move but as soon as it hits a wall it will stop. This is because, if it continues to add or subtract from its position, then it will be outside the bounds of the screen. To fix this and make the ball bounce off the walls, you will have to add methods to check if the ball is at a wall and, if it is, change the direction of the ball.

Check if the Ball Hits a Wall

We need to check if the ball is at a wall so we can switch it's direction. We use getX() and getY() to determine the ball's location. If getX() is less then 10, the ball is at the left side of the screen and if it is greater than the width of the screen minus 10 pixels of padding, it is at the right side of the screen.

Add the following code after the act() method in the "Ball" source file:

 public void checkSides()
{
    if(getX() <= 10)
    {
        goLeft = false;
    }
    else if(getX() >= getWorld().getWidth() - 10) // if
    {
        goLeft = true;
    }
} 

Like act(), checkSides() is also a method. There is difference between checkSides() and act(), however: because we manually made this method, Greenfoot will not use it until we tell it to like it does with the act() method, which Greenfoot uses implicitly. Since we know act() already runs code, we want to make sure that our checkSides code is also run. To do this, we must call it. Do this by putting checkSides() at the bottom of the act() function like:

 public void act() 
{
    if(gameOver == false)
    {
        int changeX = 0;
        int changeY = 0;
            
        if(goUp == true)
        {
            changeY = changeY - 1;
        }
        else
        {
            changeY = changeY + 1;
        }

        if(goLeft == true)
        {
            changeX = changeX - 1;
        }
        else
        {
            changeX = changeX + 1;
        }
            
        setLocation(getX() + changeX, getY() + changeY);
         
        checkSides();
    }
} 

Notice that the call to checkSides() is still in between the braces started up at the top of the act() method with the check

 if(gameOver == false) 

That's because we don't want to worry about whether or not the ball hits the sides when the game is already over.

This covers the side walls of the game. We also have to worry about what happens when the ball hits the top and bottom of the screen. Use this method:

 public void checkTopAndBottom()
{
    if(getY() < 5)
    {
        goUp = false;
    } 
    else if (getY() > getWorld().getHeight() - 5)
    {
        gameOver = true;
    }
} 

The top of the screen has a coordinate of 0 so if getY() is less than 5 we know the ball is at the top of the screen. When this happens, the Ball's goUp variable is set to false because it should now move downwards. The "else if" does something different; it says that, if the ball hits the bottom, then the game is over.

Remember: This method still needs to be called while the game is running, so make sure to put:

 checkTopAndBottom(); 

right underneath the call that you have in the act() method to checkSides().

The only thing left to check is whether or not the ball hits the paddle.

Add this method to the Ball class:

 public void checkObjectCollision()
{
    Actor paddle = getOneIntersectingObject(Paddle.class);
    if(paddle != null)
    {
       goUp = !goUp;
    }
} 

And also put the call to this method underneath the checkSides() and checkTopAndBottom() that we have already added. This snippet of code is telling us that if our ball ever happens to hit a paddle, then go in the opposite direction we are already going.

To test all of this, make sure to save your files, press the compile button, and add a ball and a paddle to the game screen. When you press "Run", you should see the ball bounce off the walls and your paddle, and stop when it hits the bottom of the screen.

Step 4: Creating The Bricks

To the complete the game we need bricks. This process is similar to when you were creating the paddle class. Follow these steps:

  1. Right click on the "Actor" tab on the right hand side of the main project screen.
  2. Select "New subclass..." from the list of options.
  3. Name this class Bricks.
  4. Select the "brick.png" image from the objects category.
  5. Press "Ok" when finished and compile your project.

You will not need to add any code to this class because all we do not need this object to move. All we need is the brick image.

Making Bricks Break

The main point of Breakout is for bricks to break when they are hit by a ball. To do this, we're going to add the following code in the Ball class's checkObjectCollision() method:

 Actor brick = getOneIntersectingObject(Brick.class);
if(brick != null)
{
    goUp = !goUp;
    getWorld().removeObject(brick);
} 

It looks similar to when a ball hits a paddle, in that its direction will reverse. However, there is an extra line of code here as well. It's telling the world to remove the brick that the ball has just hit.

Save, compile, add objects, and run your program to test it out!

Step 5: Adding All The Objects To Your Game

Now that you have made all the different objects for your game it is time to test them all out. To make the game work we need a ball, a paddle, and at least a couple bricks. The process of adding an object to the game is the same for all objects. As an example, follow these steps to add a paddle to your game:

  1. Right click "Paddle" tab on the right hand side.
  2. Select "new Paddle()" from the list of options.
  3. Now use the mouse to drag the paddle onto your game screen and click again to place it.
  4. Repeat these steps to add a ball and the bricks.

If you want to add a bunch of bricks to your game without having to add them individually, add the following code into the public MyWorld() method within the MyWorld source file:

 int x,y;
x = y = 20;
for(int i = 0; i < 195; i++){
     Bricks temp = new Bricks();
     addObject(temp,x,y);
     x+=40;
     if(x >= 600){
          x=20;
          y+=20;
     }
} 

This will add 195 blocks and arrange them in the appropriate order.

Full Example

If you were unable to get your game working the full example is available for download here.